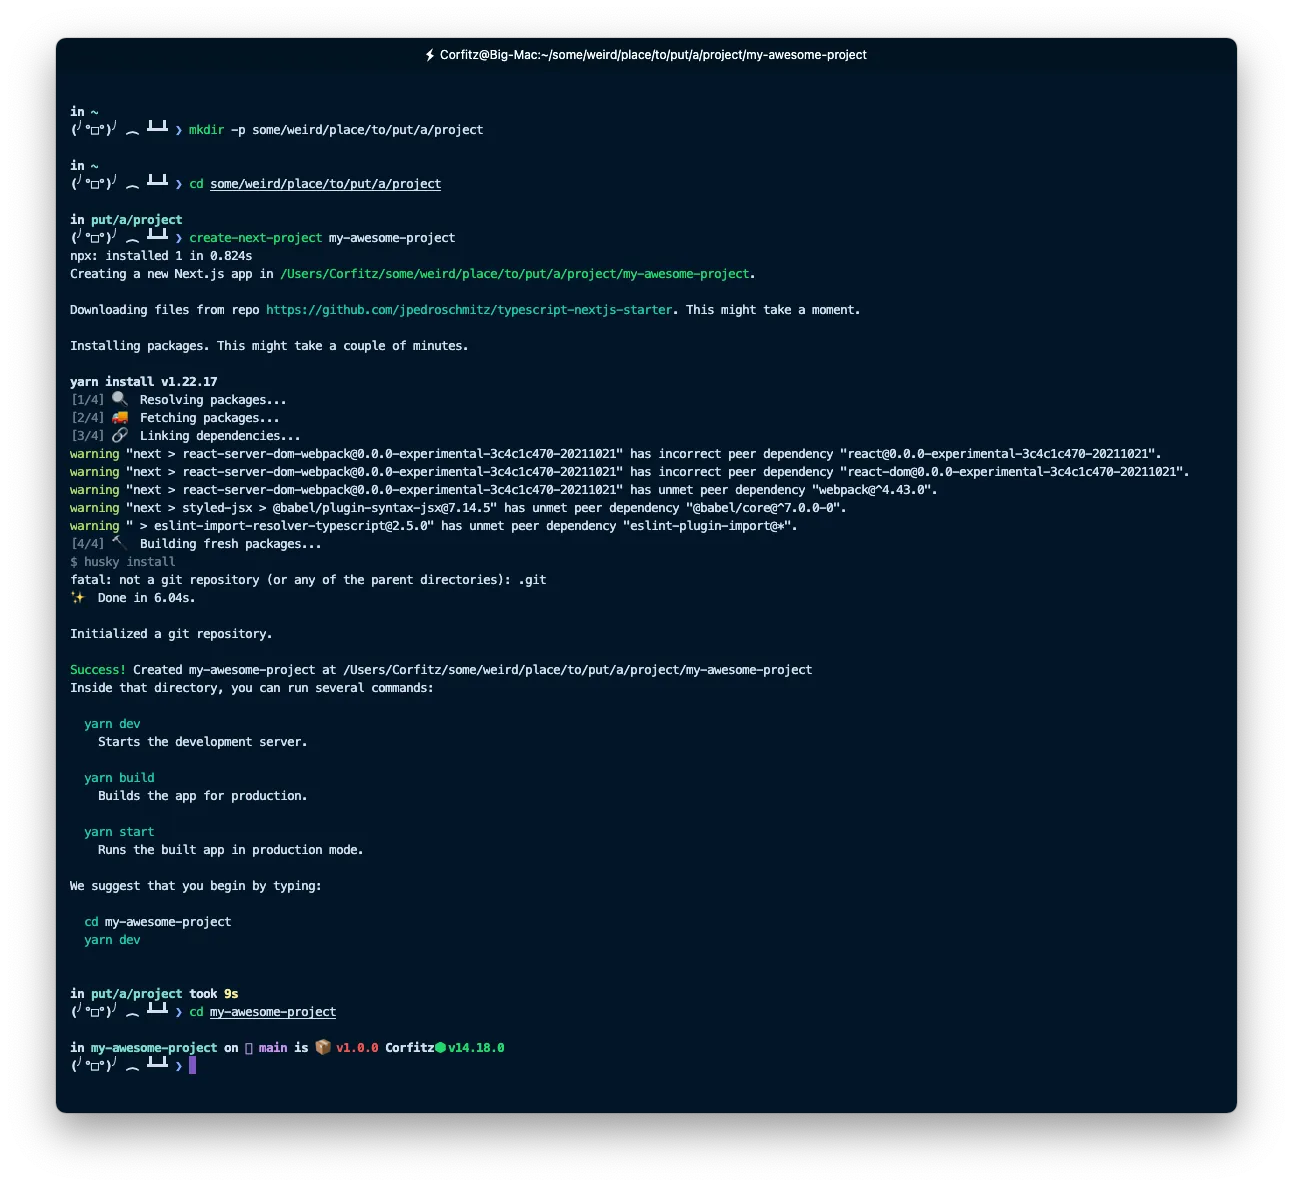
Create a custom create-next-project command
It is no secret that Next.js is kinda my go-to framework for pretty much anything. Whether being client work, own projects, play grounds etc. But whenever I engage in bigger projects, I usually went through a long process of preparing my repo, getting latest packages and establishing a foundation from which the project could grow. Ohh what a tiresome and long process…

Usually this involved configuration of TypeScript, ES Lint, CI/CD files for Gitlab, setting up src directory structure along with aliases in TS Config, adding .npmrc file with save-exact=true to ensure packages being installed and added to package.json don’t differ from one another when deploying the app 6 months later. (I have spent many them evenings wondering why everything worked well locally but for some reason got messed up once deployed to staging environment — or worse; production 😰).
March last year, a lad by the name of João Pedro Schmitz (@jpedroschmitz) from the GraphCMS team, published an un-opinionated boilerplate for Next.js with TypeScript and a couple of other fancy prep-work including Husky, commit linting, Prettier configuration, git commit message helpers etc. along with pretty much all other stuff I spent too long setting up every time I wanted to get rolling on a new project.
It has become one of my favourite projects on GitHub, and I find myself coming by regularly to fetch the installation script: npx create-next-app ts-next -e https://github.com/jpedroschmitz/typescript-nextjs-starter.

As one probably will notice, it is one heck of a one-liner to remember when going to start a project. So, lazy as I am, I went to create a little zsh function to spare me the trouble of having to either remember it or looking it up every time.
Now all I have to do is simply write create-next-project <project-name> and BOOM! I have everything I need to crack on.
Enough talking — now show me!
Certainly — but first! A little disclaimer… Please note I am working on a Mac, and I have zsh as my main shell. I am unfortunately not as familiar with the Windows system, so this explanation will focus on those prerequisites. If you have the linux shell enabled on your Windows system, you may be able to follow along. Should anyone out there wish to share the process of achieving same on a Windows machine, please share with me and I can update this article with your explanation.
Now — back to the show!
First up — let’s open our terminal of choice. (In my case I am using Hyper terminal with Night-Owl theme and a few plugins). In our user’s home directory, let’s create a .functions file. The reason we make it a a dot-file is simply to hide it from the file-listing when browsing the directory — thus also avoiding the chances of us deleting the file later on by a mistake.
So we start by simply writing nano .functions which will open up a text editor in our terminal. Here we can begin adding our new function.
Initially I had made this an alias, but realised I couldn’t pass parameters to the alias, hence why we create our own little function here.
# $HOME/.functions
function create-next-project() {
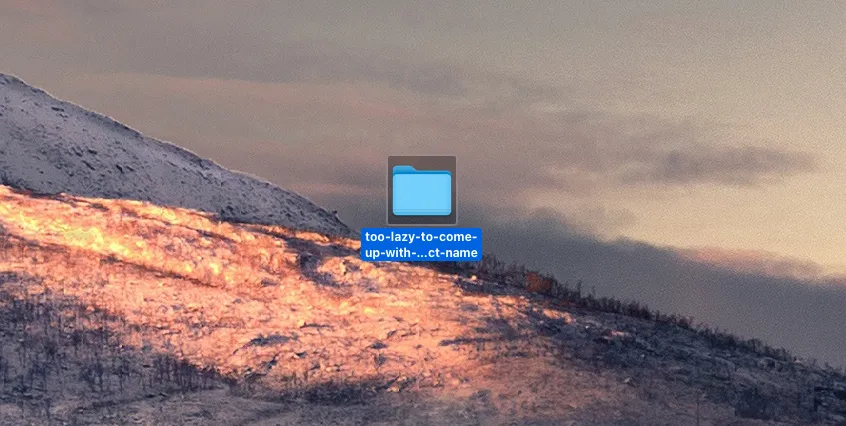
NAME=${1:-too-lazy-to-come-up-with-a-project-name}
npx create-next-app $NAME -e https://github.com/jpedroschmitz/typescript-nextjs-starter
}
# In order to have these functions available in your terminal at all times
# make sure to add following command to your .bashrc or .zshrc file:
# source $HOME/.functionsCopy and past above code in to your file and press ^c followed by ^x to save and exit the editor.
As you can read in the code above, all left to do is add the line source $HOME/.functions to our .bashrc or .zshrc file in our user’s home directory. So next we write nano .zshrc (or .bashrc if that is your choice of shell), and paste in source $HOME/.functions at the bottom of your file. And then — you guessed it! — press ^c followed by ^x to save and exit the editor.
Once done, we can now reload our terminal (close it and open again), and we should then be able to write our new create-next-project command and get started on our exciting next project (no pun intended).
You now have 3 options for how to execute the command:
create-next-project <project-name>where you substitute<project-name>with the actual name of your project.- Run
create-next-project .inside your desired project folder. The period will tell the command to execute the creation of a new Next.js project inside the folder where you currently are. create-next-projectwithout anything, from which the command will assume you are rather lazy and thus naming the project folder “too-lazy-to-come-up-with-a-project-name”.
Should you wish to change the default folder name, you simply change this line in the .functions file:
NAME=${1:-too-lazy-to-come-up-with-a-project-name}to something like
NAME=${1:-default-project-name}The only thing important is to not remove 1:- within the curly braces. This tells the command to use the first command parameter (1) given — and if not provided it should instead use (:-) — followed by the string to use as fallback.
Final thoughts
I can really recommend the “Next.js Typescript Starter”-repo as a solid foundation for your future Next.js projects, as it also helps you achieve an overall better code quality, commit standard, and generally helps you build higher quality apps.
Now I realise not everybody uses Next.js every day, or may be starting a new project once or twice a week, so this can for some seem a little unnecessary, to go through all this trouble to create a helper function— though I thought this would prove to be a fun little gimmick, and something worth sharing.
And that would pretty much be what this written piece is about. Just me sharing one of my favourite GitHub repos along with some playfullness in building custom functions in the terminal. At the same time, one can now see how easy it actually is to create custom terminal functions to execute common queries — so good luck building. 🤓 🥃